Work Hours management
Access to the Work Hours editor is normally restricted to superuser roles and above.
All resources have a set of work hours, which represent their start time and the amount of time they have available each day to be assigned bookings and unavailabilities.
To view and edit work hours, on the main menu, click Environment | Work Hours.
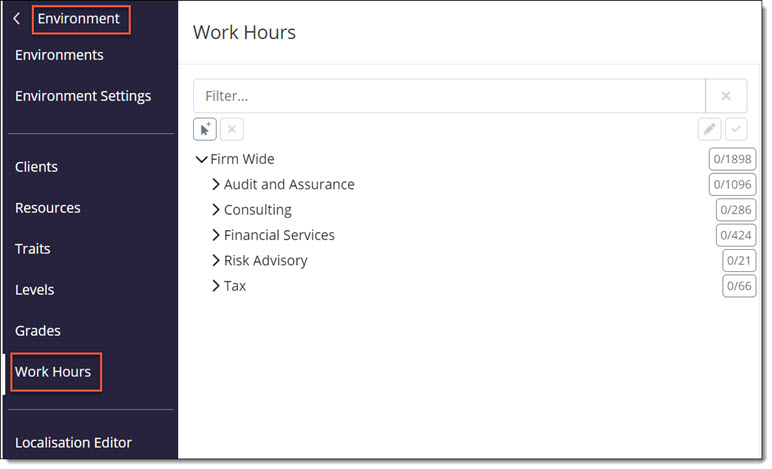
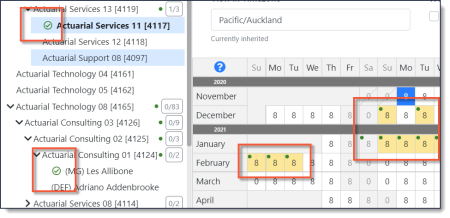
The top level of the hierarchy is displayed and this can be clicked to expand to view the various functional units and the resources they contain. Work hours can be set at any level of this hierarchy and all entities (functional units and resources) below the selected entity will inherit these work hours. This extends all the way down to the individual resource, whose own personal working hours can be set if necessary.
The multi-select button  at the top of the hierarchy can be selected to enable quick selection of multiple entities.
You can only change work hours in the future and within two calendar years.
To change the work hours of a functional unit or an individual:
-
With the Work Hours page open, use the tree structure or the text filter to find the functional unit or the resource whose working hours you would like to change.
-
Click on the name of the functional unit or resource and the working hours table appears in a calendar view in the main section of the page:
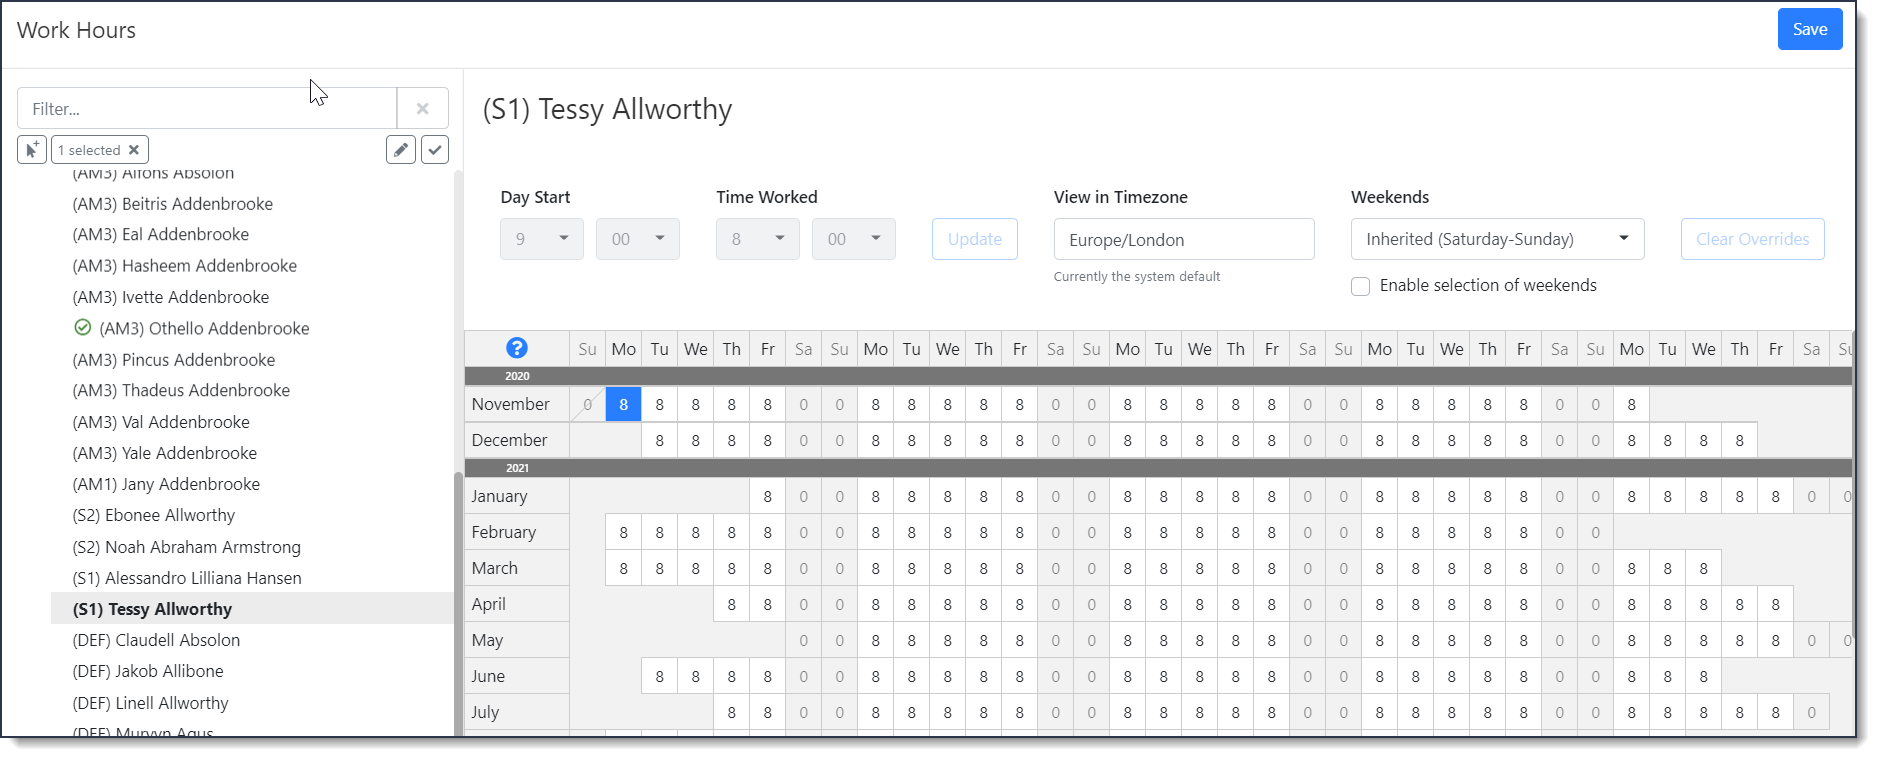
If multiple entries are selected, the work hours details are not displayed.
-
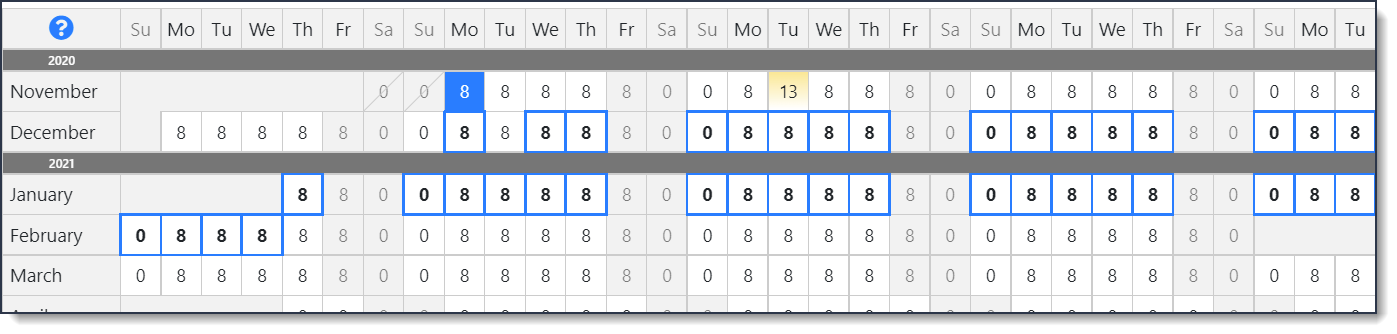
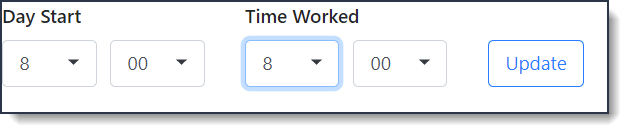
The Day Start and Time Worked is shown in the top left of the resource work hours page. To change the hours for a particular date or range of dates, select the date(s) for which you would like to change the hours by highlighting the cells (click on the first date and either drag the cursor to the last date in the required range or use Shift + Click on the last date).
-
You can choose multiple ranges by holding Ctrl and highlighting the different date ranges. Cells that have been selected for editing will be shown with a blue outline.
-
Change the Day Start time and/or Time Worked hours by using the drop-down menu to choose the relevant time or hours.
-
The Weekend that is defined for the resource or the resource population is displayed in the Weekends field.

With the necessary permission, you can change this to suit a resource or all of the resources within a point in the functional unit hierarchy (known as the resource population). -
Once you have made the changes you would like, click Update. The days you have edited appear in a different colour.
-
Click the information icon
 to display the key to the colours used for the work hours table cells.
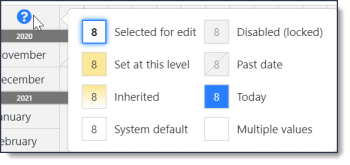
-
Functional units and resources in the hierarchy that have been edited but are as yet unsaved are shown with green ticks. Similarly, edited but unsaved changes to individual work hours cells are highlighted with a green disc.
You can continue making changes as required, and when finished, select Save at the top right-hand corner.